Table of Contents
Introduction
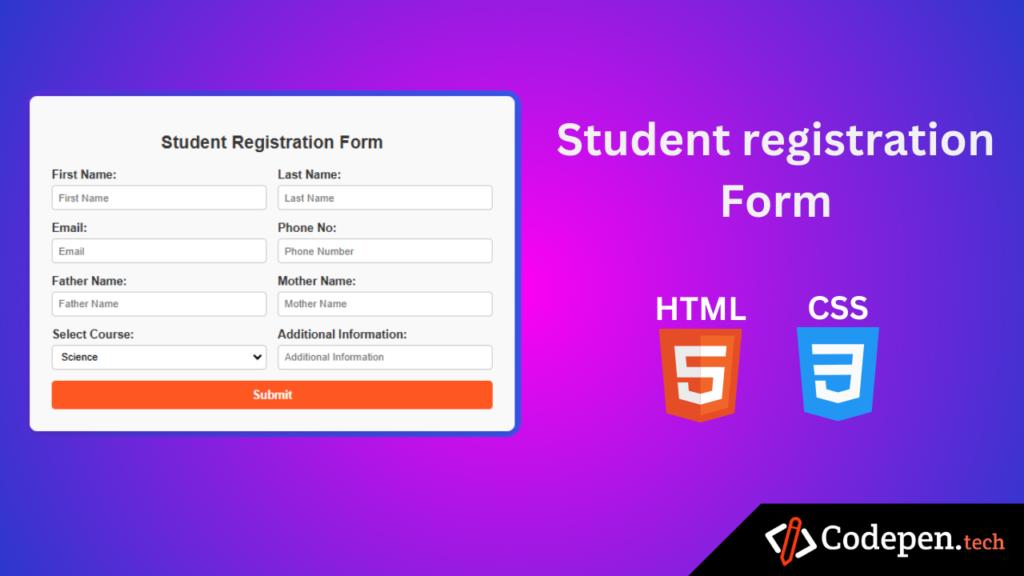
A student registration form in HTML code is a foundational web development exercise that allows you to create a structured interface for collecting user information. Whether you’re a beginner or an experienced developer, building a registration form helps you understand the fundamentals of HTML form elements, input fields, and their styling with CSS. This tutorial will guide you through creating a simple yet effective student registration form with clean code and responsive design with HTML and CSS code.
HTML Code
First, we’ll create the basic structure of the form using HTML. This form includes fields like Name, Email, Phone Number, Address, Gender, Courses, and a Submit button.
<!DOCTYPE html>
<html lang="en">
<head>
    <meta charset="UTF-8">
    <meta name="viewport" content="width=device-width, initial-scale=1.0">
    <title>Student Registration Form</title>

</head>
<body>
    <div class="container">
        <h2>Student Registration Form</h2>
        <form action="#" method="POST">
            <div>
                <label for="firstName">First Name:</label>
                <input type="text" id="firstName" name="firstName" placeholder="First Name" required>
            </div>
            <div>
                <label for="lastName">Last Name:</label>
                <input type="text" id="lastName" name="lastName" placeholder="Last Name" required>
            </div>
            <div>
                <label for="email">Email:</label>
                <input type="email" id="email" name="email" placeholder="Email" required>
            </div>
            <div>
                <label for="phone">Phone No:</label>
                <input type="tel" id="phone" name="phone" placeholder="Phone Number" required>
            </div>
            <div>
                <label for="fatherName">Father Name:</label>
                <input type="text" id="fatherName" name="fatherName" placeholder="Father Name" required>
            </div>
            <div>
                <label for="motherName">Mother Name:</label>
                <input type="text" id="motherName" name="motherName" placeholder="Mother Name" required>
            </div>
            <div>
                <label for="course">Select Course:</label>
                <select id="course" name="course" required>
                    <option value="">-- Select --</option>
                    <option value="science">Science</option>
                    <option value="commerce">Commerce</option>
                    <option value="arts">Arts</option>
                </select>
            </div>
            <div>
                <label for="additionalInfo">Additional Information:</label>
                <input type="text" id="additionalInfo" name="additionalInfo" placeholder="Additional Information">
            </div>
            <button type="submit">Submit</button>
        </form>
    </div>
</body>
</html>
CSS Code
To make the form visually appealing, we’ll style it using CSS. Save the following code in a file named styles.css.
 <style>
        body {
            font-family: Arial, sans-serif;
            background: linear-gradient(to right, #6a11cb, #2575fc);
            margin: 0;
            display: flex;
            justify-content: center;
            align-items: center;
            height: 100vh;
        }
        .container {
            background-color: #f9f9f9;
            border-radius: 10px;
            box-shadow: 0 4px 15px rgba(0, 0, 0, 0.2);
            padding: 30px;
            width: 600px;
        }
        h2 {
            text-align: center;
            color: #333;
            margin-bottom: 20px;
            font-size: 24px;
        }
        form {
            display: grid;
            grid-template-columns: 1fr 1fr;
            column-gap: 15px;
            row-gap: 15px;
        }
        label {
            display: block;
            font-weight: bold;
            color: #333;
            margin-bottom: 5px;
        }
        input, select, textarea {

            width: -webkit-fill-available;
            padding: 8px;
            font-size: 14px;
            border: 1px solid #ccc;
            border-radius: 5px;
            outline: none;
        }
        input:focus, select:focus, textarea:focus {
            border-color: #2575fc;
        }
        .full-width {
            grid-column: span 2;
        }
        button {
            grid-column: span 2;
            padding: 10px 20px;
            font-size: 16px;
            font-weight: bold;
            color: white;
            background-color: #ff5722;
            border: none;
            border-radius: 5px;
            cursor: pointer;
            transition: background-color 0.3s;
        }
        button:hover {
            background-color: #e64a19;
        }
    </style>
To learn CSS enhances the form’s visual appeal, making it more user-friendly. To explore more CSS properties and their applications, visit this site MDN CSS Tutorial.
Attachments

Your download will begin shortly…
30 seconds remaining
Conclusion
By following the steps above, you now have a fully functional student registration form in html code built using HTML and styled with CSS. This form collects user data, ensuring accessibility and responsiveness. You can further enhance this form by adding JavaScript for validations or integrating it with backend systems for storing data.
Key Learnings:
- Structuring HTML forms for user input.
- Using CSS to style and enhance user experience.
- Creating responsive designs for compatibility across devices.
Feel free to customize the form to suit your specific requirements or preferences.
Happy coding! 🎉